On this page, we’ll look at the basic steps for layout work, as outlined in Chapter 10 of Teaching Digital Photography: The Ultimate Guide to ‘Tween and Teen Learning by Keith Kyker (Libraries Unlimted, 2014) This is a brief explanation. The Chapter goes into detail about the steps, as well as instructional strategies and additional options for teaching basic layout skills. Think of this web-page as a rough outline (with illustrations) for that section of Chapter 10.
Before we begin, here are two things worth mentioning.
- The software used is Adobe Photoshop Elements 8. I purposely used an older, less-expensive version of Adobe image adjustment software to illustrate the fact that you don’t need the latest, greatest, most-expensive software to adjust your images.
- You can enlarge each image on the screen by clicking on it.
First we create a new image file. I like 8 x 10, landscape with a black background and 300 ppi.
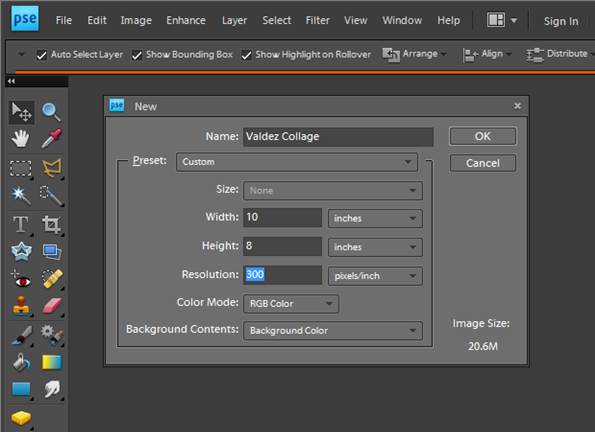
This presents a nice, black rectangle that fits nicely in the work space.

Next, we will place some digital images onto the blank image.
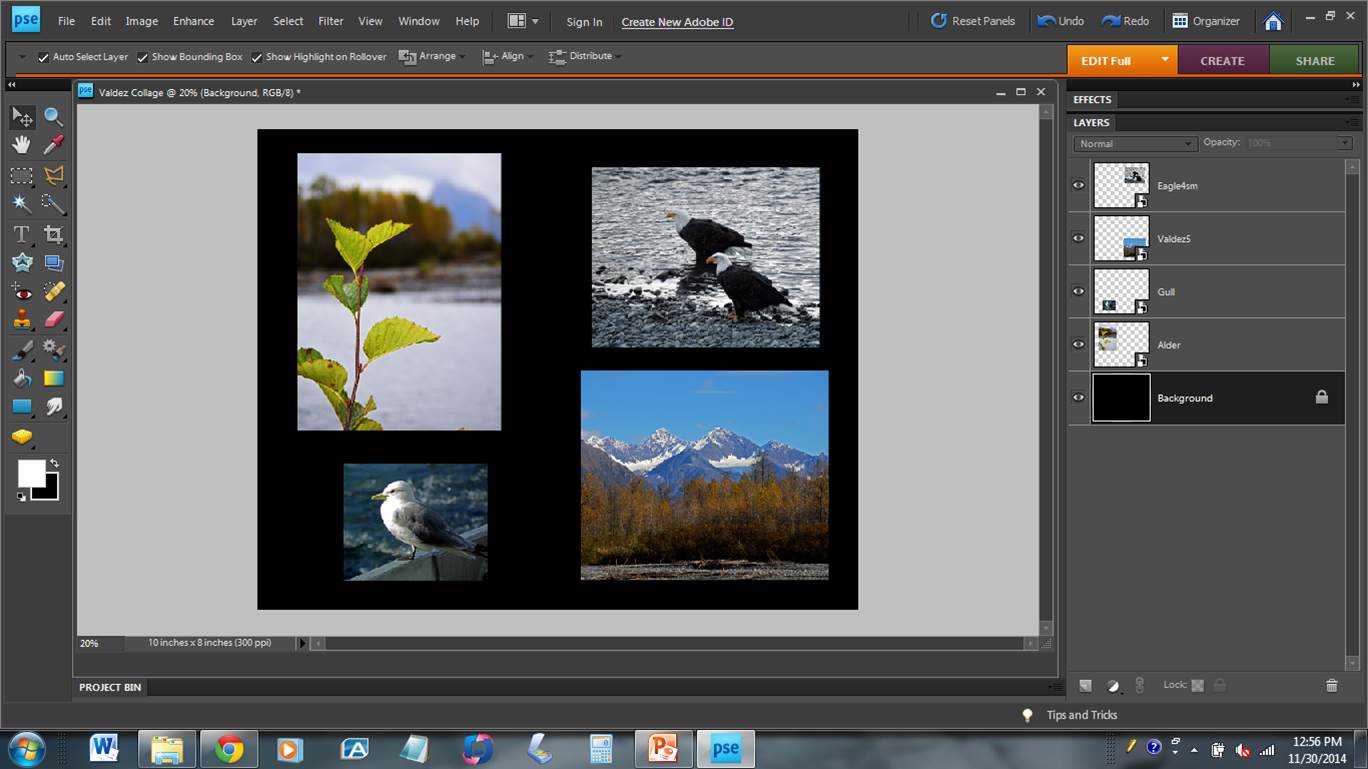
Then, we create some text for our image. This particular image contains two different text layers. You can see all of the layers on the Layers bar on the right side.

Our final step is to add a shape. This is a white oval, blurred. Notice on the Layers bar (right side) that the shape is the bottom-most layer, just above the background. This makes the layer appear behind/below the pictures and the text layers.

==========================================================================
Notice: this web-page, all images, and all instructions are copyright 2014 Keith Kyker. Read the web-page. Learn from it. Link to it. Use it as a teaching tool with students enrolled in your class. But do not copy it and/or claim it as your own work. Thank you.